Showing posts with label value studies. Show all posts

Saturday, April 20, 2013

Have Brushes Will Travel

On a recent trip to VA I was lucky enough to visit Norfolk Drawing Group. They are an amazing bunch of artists. They have been going strong for years and know how to show a girl a good time!

Here are a couple of the pieces I did that night. 
20 minute, oil on vellum, 12x9
I'm enjoying working on the vellum. It is Borden & Riley Denril Multi-Media Vellum. I block in an abstract shape and rub out with a scrap of T-shirt material.
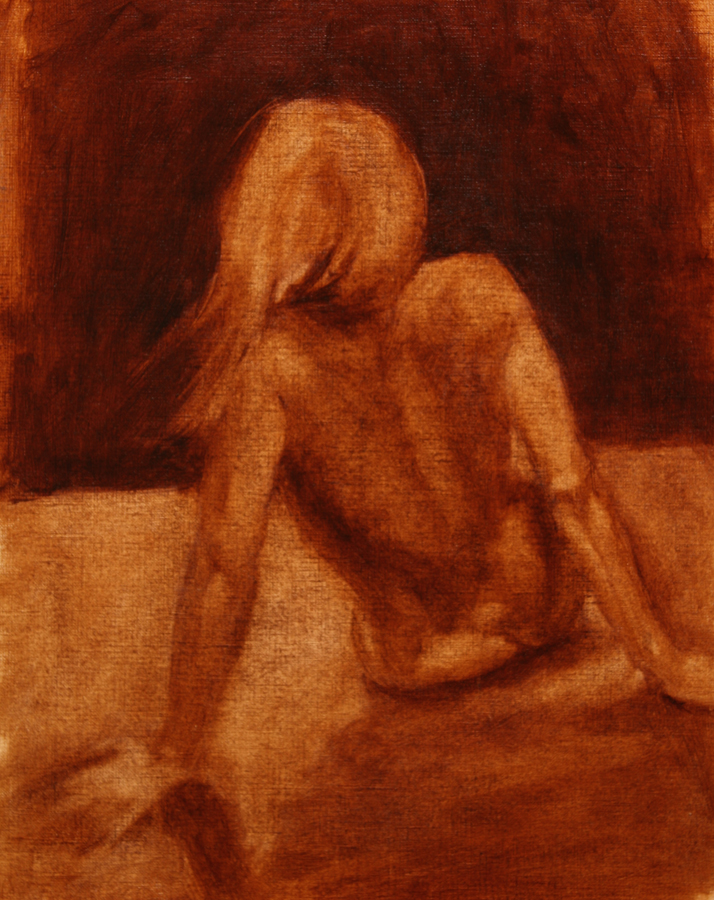
40 minute, oil on Ampersand Gessobord, 14x11
I worked on the background of this one after I got it back to B'ham. I simplified and made it darker. 
The model was late so one of the drawers jumped in to do gesture poses, (Thanks Carol!)
The 40 minute pose, oil on canvas by my friend Mark Miltz
Walt Taylor, the renown artist of Crack Skull Bob sketch blog captured me in the act. He says he was inspired by my boots :)

I have his book, Under the Rancid Toreador. It is comprised of selections from his blog and is hysterically funny. I read it from cover to cover chuckling to myself. I highly recommend it and his blog.

Carol, Mark, Me and Walt
Sometimes people have been known to skip the main event and just show up for the after party, sorta' like in Hollywood.

Sunday, December 23, 2012

7 Steps to Plaster Cast Painting For Artists

Step 1- Beg, borrow or steal some cool casts. One of my students happened to have them so she has generously loaned them to my class for a few weeks. If you're not so lucky, you may have to buy them like she did here.


Step 2- Set each of them up and add some funky lighting.
Hint: To arrange them up I set up a table easel, used S hooks to attach them to a sheet of masonite that had been covered in a black drape, and lit it with a clamp-on light. The bulbs are Phillips, Director, 60W, 120V.


Step 3- Do a pencil drawing on a canvas or panel.


Hint #1: Get in a comfortable position and plant your feet. Choose to stand or sit but remain at the same eye level. Try to move only your eyes to keep your view of the still life the same.
Hint #2: Check proportions, how wide is it compared to how tall? Start in general, straight lines, loose shapes and move to more specific. 

Saturday, October 8, 2011

Value Study With a Twist

I'm moving my students from value studies to full color.
Day 1- This is my demo piece of an under painting using an open grisaille method. Grisaille is painting in monochrome and open meaning that the white of the canvas is allowed to show through the paint for the lighter areas of the painting, much like a watercolor technique. If we were painting in the whites with white paint it would be a closed grisaille.

This is a very similar effect as the rub out painting I had them do a few weeks ago. We thinned the paint, Burnt Umber, with a 60/40 mixture of  linseed oil and odorless mineral spirits and painted using an additive method rather than a subtractive method like the rub out. I like doing this type of under painting because it is a value study that you build on rather than do and discard.

I introduced color by adding one piece of fruit to each of the mug and egg still-lifes they'd been working on. Different set-ups had a green apple, a lemon or a red apple.

Day 2- I demonstrated pre-mixing color for the areas to be painted that day. Working from the background to the foreground and painting adjacent forms simultaneously I laid in the forms and simple colors of the lemon and the area around the lemon. (sorry no picture :(

Day 3- I demonstrated bringing one area of the painting to a more finished level. I started by oiling out, rubbing a mixture of medium (60/40 linseed oil and OMS) and a bit of Res N Gel over the sunk in area where I was going to be painting that day. Sinking in is when the oil is drying and the pigments on the surface look chalky or dry.
The couching layer of the oiling out helps the new layer adhere and also helps you see the colors you'd previously painted. Colors can get hard to judge as they dry and this basically brings them back to full saturation.

As I painted I emphasized keeping edges soft, especially in the reflections in the mug and cast shadows. I encouraged them to really look at the objects and challenge themselves to paint by observation.

Only by this intense observation would one notice the way the silver mug throws blue onto the side of the lemon nearest it, or how red the shadow on the under side of the lemon is.

All the students came up with great little paintings. Next up for the class is an all blue still-life and the challenge of differentiating and mixing all those different subtle colors.

It's fun to dream up ways to torture them in a good way!

Thursday, August 25, 2011

"Ay, There's the Rub"

I could not resist this title for my post about this week's oil painting class, and my quick demo using a rub-out underpainting technique.

The phrase is Shakespeare’s. It comes from Hamlet’s famous “To be or not to be” soliloquy: 

To die — to sleep.
To sleep — perchance to dream: ay, there’s the rub!
For in that sleep of death what dreams may come
When we have shuffled off this mortal coil,
Must give us pause.


By rub, Hamlet means a difficulty, obstacle or objection.

How fitting a reference for this task we have chosen for ourselves. mastering the craft of painting, living the life of an artist. It can be the stuff of dreams or nightmares, it's the dream times that keeps us coming back for more.

When things are going well in the studio we seem to float on the current, lose track of time in a deep focus, it does seem rather dream like; yet when we are struggling against the current, reaching for the next level for our work, we are still learning, we will come out the other side (unlike Hamlet) and our work will be stronger for it.

I consistently remind my students struggle is learning, each new failure is a stepping stone to the next, better, painting.

All that said my students did great with this exercise and seemed to enjoy it! Using only Burnt Umber they covered the canvas with paint thinned only a bit with a mixture of linseed oil and OMS.

Then rubbed out the lighter values and highlights, using value to create volume.

This is the third in a value series I've had my students working on. You can see those and other teaching posts here.

Shakespeare continues to inspire, here is a link to a few of my paintings exploring some of his themes in a contemporary way.

Saturday, August 20, 2011

Value of Practice

Last week I did a second value poster study with my class. We are attempting to solidify this concept before moving on to color temperature. Here is the very quick demo I did for them.
They all worked hard the first week to understand what they were seeing and get it down, judging one value against another as they painted from the background to the foreground and from darkest to lightest.

We used raw umber and ivory black to mix our darkest value, then mixed a middle value.


Using mixtures of the middle value with our homemade black we mixed two additional dark values.


Then we used the middle value with titanium white to mix two additional light values.


This resulted in a string of color puddles that gave us 7 values to work with. They should eventually work toward seeing 9 or 10 values.


This gave them experience simplifying basic forms into values without the complication of color or temperature.


It also gave them experience mixing paint into color strings, a great way to work and the method I teach.


Next week we will continue with this two steps forward and one step back journey learning these color theory concepts.


I will have them do a rub out painting using burnt umber which is a standard under painting practice and one my students love once they give it a try.

Patience my lovely students, remember practice while reaching is learning! Linger in the uncomfortable zone.
This is one of my 9x12 figure sketches using this technique. I painted it in Charleston last fall while on the Women Painting Women on Expedition painting retreat. 

Here is a link to a few of my other posts about teaching including one about the rub out technique. I'll post the demo after class next week.

Wednesday, August 10, 2011

Two Steps Forward - One Step Back


This week I had my oil painting class do quick poster studies of a silver mug and an egg. This is my demo piece. I call this The Value of Back to Basics. (I apologize for that but I love puns.)

I've had several students  quiz me about the difference between the color properties of value and temperature. Since experience is the best way to learn I designed this simple exercise to take them back to a basics lesson. Back to basics is a great way to freshen up and invigorate even the most experienced painter.

We used raw umber and ivory black to mix our darkest value, then mixed a middle value.

Using mixtures of the middle value with our homemade black we mixed two additional dark values.

Then we used the middle value with titanium white to mix two additional light values.

This resulted in a string of color puddles that gave us 7 values to work with. They should eventually work toward seeing 9 values.

This gave them experience breaking down simple forms into values without the complication of color or temperature.

It also gave them experience mixing paint into color strings, a great way to work and the method I teach.

We will be continuing with this for a few weeks in my class working on these color theory concepts, taking small steps backward and forward.  Learning to paint is that kind of meandering journey!

Here is a link to a few of my other post about teaching.

Saturday, March 19, 2011

Underpainting Demo

Today, at the request of Forstall Art Center management, I did a free demonstration of under painting techniques using Gamblin's new FastMatte fast drying oil paint. It is an alkyd resin and linseed oil binder. The paint is designed to be used instead of acrylic for toning canvases or doing under paintings.

I set up a still-life of a clementine orange and red grapes. I have a set up made of foam core sides, black fabric covers the back and sides and a sheet of black foam core on the top. There is a hole in the top to clamp a light from above, this blocks the overhead studio lights.  This way the drama of a single light is not diluted by the studio lights.
 
I toned an Ampersand Gessobord with Fastmatte thinned with a mixture of Galykd and odorless mineral spirits. This mixture was drying very quickly even as I worked. It will be completely dry in 18-22 hours. I did a rub out or reductive value study, simply rubbing out the paint with a t-shirt scrap.
On a second panel I did a pencil drawing, then restated it in a permanent sepia Faber-Castell artist pen. Then I did a rub out painting on top of the sepia drawing, this time trying the paint with a mix of linseed oil and odorless mineral spirits. This mixture stayed wet longer and gave me more time to work the study. Using a sepia pen to secure your drawing works well with more complicated paintings.

Either one of these methods will dry quickly and could be continued in a day or two with full color. Here are a couple of other studies I've done at the local life drawing group.
 5-minute rub out gesture sketch
1 hour rub out oil sketch
 And here's one I did on the Women Painting Women on Expedition last November.
I'm enjoying this technique very much and find that if the study is pushed far enough it is beautiful even with out adding any color. It takes the place of doing value studies when used as an under painting and helps me resolves problems relating to placement on the canvas or value. 

Find out more about FastMatte at the Gamblin site.

LinkWithin

Related Posts Plugin for WordPress, Blogger...